Queen

Ett smart sätt att hantera dina SSH nycklar är att låsa upp dom när du loggar in på din dator.
Om du känner dig modig, kan du använda KDE wallet i symfoni med ssh-agent och lagra ditt lösenord för att låsa upp dina SSH-nycklar i KDE wallet och på så vis låsa upp dina nycklar när du loggar in på din dator.
Givetvis går detta att göra med andra skrivbordsmiljöer, men beskrivningen här är för KDE och borde fungera på alla Ubuntu distributioner.
Om du inte redan har en ssh nyckel med lösenord, börja med att generera en sådan.
[ogg@intel ~]$ ssh-keygen
Generating public/private rsa key pair.
Enter file in which to save the key (/home/ogg/.ssh/id_rsa):
Created directory '/home/ogg/.ssh'.
Enter passphrase (empty for no passphrase):
Enter same passphrase again:
Your identification has been saved in /home/ogg/.ssh/id_rsa.
Your public key has been saved in /home/ogg/.ssh/id_rsa.pub.
The key fingerprint is:
da:ln:ix:ge:ek:sf:or:hi:re:ca:ll:02:43:24:95:00 ogg@intel
The key's randomart image is:
+--[ RSA 2048]----+
|                 |
|    :::::::::    |
|    :+:    :+:   |
|    +:+    +:+   |
|    +#+    +:+   |
|    +#+    +#+   |
|    #+#    #+#   |
|    #########    |
|                 |
+-----------------+
Skriv ett riktigt bra krångligt lösenord.
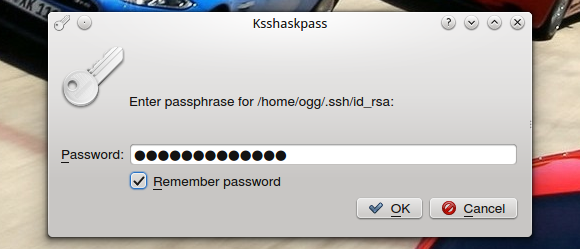
När du är klar med det, installera ksshaskpass
apt-get install ksshaskpass
Efter det skapar vi ett litet script som kör ksskaskpass vid inloggning:
cat >~/.kde/Autostart/ssh-add.sh <<_EOT_
#!/bin/sh
export SSH_ASKPASS=/usr/bin/ksshaskpass
ssh-add </dev/null
_EOT_
chmod +x ~/.kde/Autostart/ssh-add.sh
Klart!
Logga ur KDE, logga in igen, ksskaskpass kommer ploppa upp och be dig låsa upp din nyckel, bockar du i ”Spara lösenord” så sparas det i din KDE wallet och du behöver aldrig mera skriva in ditt lösenord för att låsa upp din SSH nyckel utan den låses upp när du loggar in i KDE.
Efter att ha kört Linux sen -94 har jag börjat prova lite mer FreeBSD.
Här följer info hur man får fart på UTF-8 och svenska tecken när du ssh:ar till din burk.
vi /etc/login.conf
lägg till:
swedish|Swedish Users Accounts:\

:charset=UTF-8:\

:lang=en_US.UTF-8:\

:tc=default:
spara, sen kör:
# cap_mkdb /etc/login.conf
sen lägger du till ”swedish” för din/de användare som skall ha det med:
# vipw
exempel:
bengt:$6$5dOZCAFvAFTAeKoU$E58SIMb9YWuuCVNUcb73cTm7y8JV33klhPgVNEH3EjMkp2K3V/NgKZjeMXvrQU294FdhgzG0UAos2HXIHgAIQ.:1000:1000:swedish:0:0:Bengt Bengtsson:/home/bengt:/bin/sh
On (what I’ve noticed so far) Ubuntu based distros, one thing that bugged me was that on a fresh install when you sudo into root and edit for example a config file, all comments were in dark blue color (which on a terminal with black background is terrible) but when doing it as a normal user the color theme was more pleasing (readable).
This is how I ”fix” this.
First, add these two lines to /etc/profile (which is read by /bin/bash /bin/dash /bin/sh etc at login)
sudo echo 'export COLORFGBG="15;0"' >> /etc/profile
Then, add this line in your /etc/sudoers file to keep the setting.
Defaults env_keep += "COLORFGBG"
Which makes sudo remember the COLORFGBG setting. You can add other stuff here as well, for instance maybe you want’t to be able to run stuff that only you have in your PATH with sudo.
Now when you login, and sudo edit a file you get bright colors. Yay! But wait, It don’t work you say? Well, I’m guessing you run KDE or some other fancy DE and it’s terminal. Most terminals for X do run bash, but they don’t run it as a login shell, so they don’t source /etc/profile and hence the settings above won’t do any good.
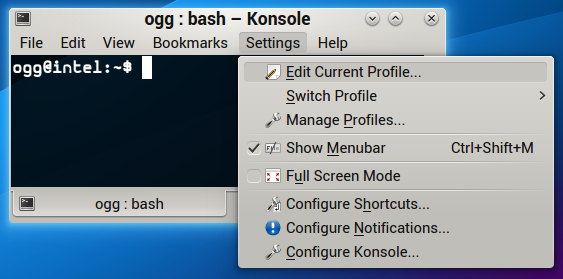
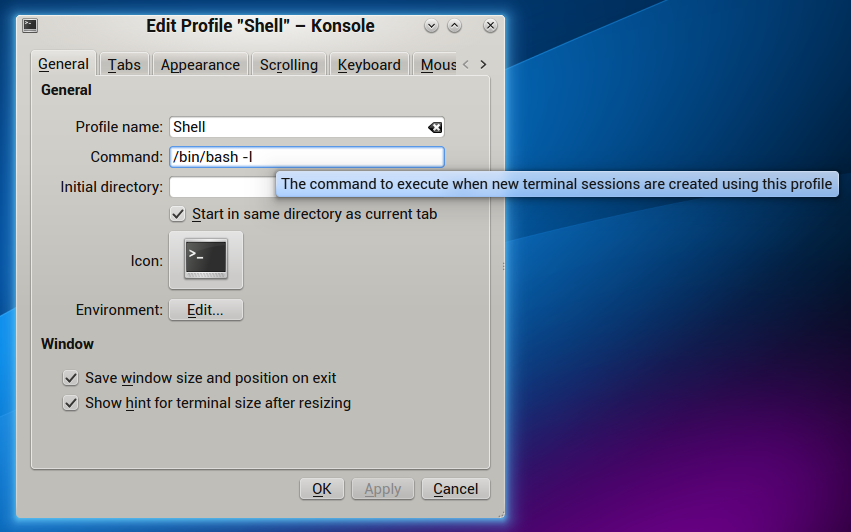
My solution is to add ”-l” to the command line starting bash, which makes bash behave as it’s running as a login shell.
Here’s how to do it in Konsole in KDE:
 So, a lazy sysadmin is often a good sysadmin. Right?
Background. At work we run Roundcube as a webmail frontend. And, we have ”skinned” it a tiny bit so it fits our companys look a bit more than the original layout. Basically I had created a custom logo and replaced the original roundcube_logo.png in the skins/larry directory plus some tiny css changes.
However, everytime I upgrade Roundcube, I had to manually revert these changes. Before you think I’m stupid; I do know you can create your own skins for Roundcube, but I rather not. Why? Well, because I can and because if Roundcube for instance change the default look, I don’t want to miss out.
So, what’s the solution you ask? Apache2 and mod_subsitute! Basically it’s sed in an Apache module. Actually, in the old days, it is called mod_sed ;).
What it does, is that, you guessed it, it searches and replaces in content before it gets delivered by the server. So, you can for instance search for ”roundcube_logo.png” and replace it with ”my_awesome_logo.png”. Pretty nifty. Also, for CSS changes, you can inject your own stylesheet. No modification of the original code needed, it’s magic!
Example config:
<Location />

    AddOutputFilterByType SUBSTITUTE text/html

    Substitute "s|</head>|<link rel=\"stylesheet\" type=\"text/css\" href=\"//static.whatever.com/roundcube.css\"></head>|ni"

    Substitute "s|<img src=\"skins/larry/images/roundcube_logo.png\"|<img src=\"//static.whatever.com/my_awesome_logo.png\"|ni"

</Location>
Place this in your virtual host. I use <
Then you’re free to make your changes in roundcube.css and point to your awesome logo.
So, from now on, whenever you upgrade Roundcube. You can just delete the old installation and unzip the new one and be done with it.
![]() Ever since I started using OSX, occasionally I got ”command not found” when piping in in the shell.
Ever since I started using OSX, occasionally I got ”command not found” when piping in in the shell.
For instance, running:
$ dmesg | grep sda
would spit out a ”grep command not found” error.
It got to the point to where I by default always when typing a | i would delete the space after and enter a space again. Annoying.
However, today I found the solution to the ”problem”.
Simply add this line to your ~/.inputrc to translate non-breaking spaces to regular spaces. Which was what caused the mishap in the first place.
"\xC2\xA0": " "
You should note that this does not happen if you type really slow.
Anyway, here’s the thread where I found the solution!

New version based on Debian 7.2 and with the latest Modoboa… watch this space. If you wan’t to help out testing the new guide, leave a comment below.
First off, this guide like 90% complete. If you follow it, please report back if something is wrong etc.
When I first started writing, I ran through the steps a couple of times installing everything from scratch, but after a while, I got tired of re installing just to try stuff out, so some things may gone wrong along the way.
These are mostly my own notes setting up modoboa. When completed, you’ll have postfix, dovecot and modoboa running with nginx.
I won’t go into detail how to configure the various modoboa extensions, this is covered in modoboas documentation.
I’m using a minimal install of Debian Squeeze for this. So, some packages may already be installed if you don’t us the same dist. The steps described here also should work on Ubuntu, but I haven’t verified that.
Replace <fqdn> with your fully qualified domain name. For example: mail.domain.com. <domain> with your domain. For example: example.com.
This guide assumes you’ll run mailserver, mysql and modoboa on the same host. If you plan to grow, it might be a good idea to separate these.
*Edit: this doesn’t actually work. I get banned for no reason, if anyone has a better regex solution please let me know =)
If you are using gitlab and nginx, the following fail2ban rule might be useful to block failed login attempts.
First, create the file /etc/fail2ban/filter.d/nginx-gitlab.conf
# Fail2Ban configuration file
#
# Author: Olle Gustafsson
#
# $Revision: 1 $
#

[Definition]

# Option: failregex
# Notes.: regex to match the password failure messages in the logfile. The
# host must be matched by a group named "host". The tag "" can
# be used for standard IP/hostname matching and is only an alias for
# (?:::f{4,6}:)?(?P[\w\-.^_]+)
# Values: TEXT
#
failregex = ^ - -.*GET.*/1\.1.* 304 0

# Option: ignoreregex
# Notes.: regex to ignore. If this regex matches, the line is ignored.
# Values: TEXT
#
ignoreregex =
then add the following rule to /etc/fail2ban/jail.local
[nginx-gitlab]

enabled = true
port = http,https
filter = nginx-gitlab
logpath = /var/log/nginx/gitlab_access.log
maxretry = 3
restart fail2ban and voila!
Rätt fränt:
/System/Library/Frameworks/ScreenSaver.framework/Resources/ScreenSaverEngine.app/Contents/MacOS/ScreenSaverEngine -background &
För att döda:
killall ScreenSaverEngine